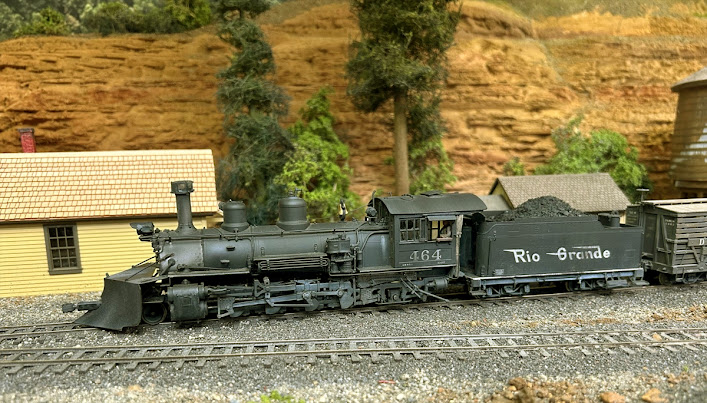
D&RGW #464
D&RGW K-27 #464 is another one of those locomotives that has spent way to much time sitting in the display case. Since I was installing soiund systems, I thought it was time to install a new high base speaker and current keeper. The original Tsunami sound system was left in place. I did have to raise the snow plow a little to avoid having the plow short out at one point on the layout where the track transitions from being level to a 2.25% grade. Here it is northbound at Wilson.
RGS #41
As I mentioned in a previous post, I acquired RGS #41, in pieces, that had been redone for Brian Ellerby's Copper River & Yukon. I need to replace the CR&Y headlight, lettering, test the sound decoder and install a current keeper.
Somewhere along the line I picked up this neat little decoder tester made by ESU. I hooked up the decoder and applied track power using my NCE Power Cab. The 2 lit green LEDs indicate the board has track power, and the white LED indicates the headlight function is working. The board can also test the backup light and 4 other functions. The board has a built in speaker and a motor in order to test the sound and motor control. The decoder turned out to be in perfect working order
Micro Sol and a fiberglass burnishing tool were used to soften and remove the lettering. The process also removed some of the paint off the tender so it will need a light coat of paint applied with an airbrush before it can be lettered for the RGS.
The Ridgway Depot
I've had my eye out for a Ridgway depot kit for some time. Back in April I finally got my hands on one and I thought I would get it started in order to have it built in time for my annual open house in July. The depot was a large structure and based upon my initial inspection the kit is going to take some time to build. I am pretty sure Joe Fuss (Ragg's... To Riches) designed this kit and it shows. I paid $195.00 plus shipping for the kit; a steal in my mind, based upon the size, design and quality of the components.
The instructions say to start with the inner walls on the waiting room end of the depot. Not wanting to risk making a mistake, I laid out the parts on my desk. The inner walls are precision cut from plywood.
The instructions call for attaching the walls to the floor. I prefer to attach the walls in sub-assemblies, squaring two corner walls together, and then attaching them to the floor.
Here all the inner walls have been attached to the flooring. The kit was designed so the size of the baggage room can be shortened if need be. My version is being built full length. It is 27" long. Every thing, to this point, has gone together perfectly!
Due to the design (variable length), the floor joints should really be reinforced. Since I don't plan on detailing the interior of the baggage room, strip wood was added the length of the baggage room floor to strengthen the joints. I also added some strip wood where the side walls join the floor.
The instructions call for painting the wainscoting and then gluing it on to the inner walls; then adding the rib rail and painting both the rib rail and the wainscoting a second time. The logic of doing so escaped me so I decided to install the wainscoting and rib rail first and then apply the paint since at this point in the assembly a little over spray isn't going to be a problem.
Other than waiting to apply the paint until after it was installed, the wainscoting was glued in place per the instructions. Since I prefer to use Aleen's tacky cement (water based PVA) for assembly, clamps were used to hold the wainscoting in place while the glue dried to prevent warping.
A straight edge was placed along the top of the wainscoting to keep things level.
PFM Coach and Combine
First of all, I want to thank those of you who responded to my quest for a PFM coach and combine set. Here is the set I obtained. They have very nice paint jobs, the windows are glazed and the coach is equipped with lights and working markers. The original trucks have also been replaced with free rolling P-B-L trucks. Are they as nice as the P-B-L models? No... But they are pretty nice layout quality models and they cost about 1/4 of what the P-B-L versions cost. Thanks, Russ.
As always, your comments, questions & suggestions are welcome


No comments:
Post a Comment