Tuesday, May 28, 2024

Construction Update #29 - D&RGW K-27 #364, RGS #41, the Ridgway Depot and the Coach & Combine

D&RGW #464

May 25, 2024

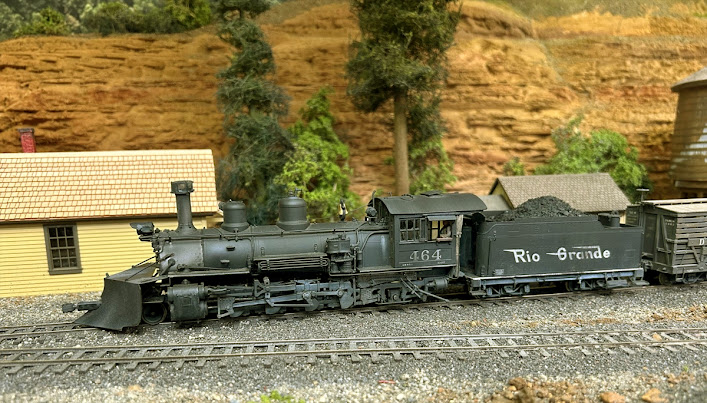
D&RGW K-27 #464 is another one of those locomotives that has spent way to much time sitting in the display case.  Since I was installing soiund systems, I thought it was time to install a new high base speaker and current keeper.  The original Tsunami sound system was left in place.  I did have to raise the snow plow a little to avoid having the plow short out at one point on the layout where the track transitions from being level to a 2.25% grade.  Here it is northbound at Wilson.


RGS #41

As I mentioned in a previous post, I acquired RGS #41, in pieces, that had been redone for Brian Ellerby's Copper River & Yukon.  I need to replace the CR&Y headlight, lettering, test the sound decoder and install a current keeper.


Somewhere along the line I picked up this neat little decoder tester made by ESU.  I hooked up the decoder and applied track power using my NCE Power Cab.  The 2 lit green LEDs indicate the board has track power, and the white LED indicates the headlight function is working.  The board can also test the backup light and 4 other functions.  The board has a built in speaker and a motor in order to test the sound and motor control.  The decoder turned out to be in perfect working order

Micro Sol and a fiberglass burnishing tool were used to soften and remove the lettering.  The process also removed some of the paint off the tender so it will need a light coat of paint applied with an airbrush before it can be lettered for the RGS.l

The Ridgway Depot

May 27, 2024

I've had my eye out for a Ridgway depot kit for some time.  Back in April I finally got my hands on one and I thought I would get it started in order to have it built in time for my annual open house in July.  The depot was a large structure and based upon my initial inspection the kit is going to take some time to build.  I am pretty sure Joe Fuss (Ragg's... To Riches) designed this kit and it shows.  I paid $195.00 plus shipping for the kit; a steal in my mind, based upon the size, design and quality of the components.


The instructions say to start with the inner walls on the waiting room end of the depot.  Not wanting to risk making a mistake, I laid out the parts on my desk.   The inner walls are precision cut from plywood. 

The instructions call for attaching the walls to the floor.  I prefer to attach the walls in sub-assemblies, squaring two corner walls together, and then attaching them to the floor. 

Here all the inner walls have been attached to the flooring.  The kit was designed so the size  of the baggage room can be shortened if need be.  My version is being built full length.  It is 27" long.  Every thing, to this point, has gone together perfectly!

Due to the design (variable length), the floor joints should really be reinforced.  Since I don't plan on detailing the interior of the baggage room, strip wood was added the length of the baggage room floor to strengthen the joints.  I also added some strip wood where the side walls join the floor.

The instructions call for painting the wainscoting and then gluing it on to the inner walls; then adding the rib rail and painting both the rib rail and the wainscoting a second time.  The logic of doing so escaped me so I decided to install the wainscoting and rib rail first and then apply the paint since at this point in the assembly a little over spray isn't going to be a problem.  

Other than waiting to apply the paint until after it was installed, the wainscoting was glued in place per the instructions.  Since I prefer to use Aleen's tacky cement (water based PVA) for assembly, clamps were used to hold the wainscoting in place while the glue dried to prevent warping.

 A straight edge was placed along the top of the wainscoting to keep things level. 

PFM Coach and Combine

May 28, 2024

First of all, I want to thank those of you who responded to my quest for a PFM coach and combine set.  Here is the set I obtained.  They have very nice paint jobs, the windows are glazed and the coach is equipped with lights and working markers.  The original trucks have also been replaced with free rolling P-B-L trucks.  Are they as nice as the P-B-L models? No...  But they are pretty nice layout quality models and they cost about 1/4 of what the P-B-L versions cost.  Thanks, Russ.


As always, your comments, questions & suggestions are welcome

sdepolo@outlook.com


Thursday, May 23, 2024

Construction Update #28 - RGS #42 and #40, 2nd District Op Session


RGS #42 First Run

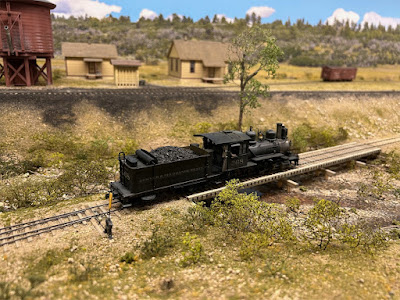
RGS 42 has successfully completed it's first run on the 1st District up to Lizard Head and back.  Pictured here at Placerville the crew is awaiting orders to proceed back to Ridgway.


2nd District Operating Session

May 19, 2024
 
Train #12, a 2nd Class timetable freight on Dale Kruetzer's fabulous RGS 2nd District, northbound at Cima Summit.  I was cleared out of Durango with K-27 #455 at 8:10am and got out of West Durango with my helper at 8:35am. 


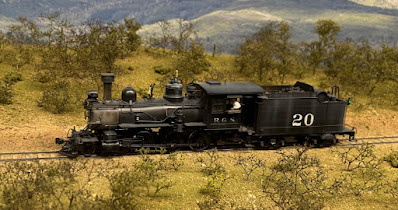
#12''s helper drifts down the grade behind #12 toward Menefee.  #20 was added on behind #12's caboose at West Durango and "pushed" all the way to Cima Summit arriving just before 11:00am.
 
 
My second assignment was helping 2nd Class freight #15 from Dolores to Cima Summit with the #268.  I ran light between Cima Summit and West Durango.  At Hesperas I backed down the coal company spur to clear the main line before heading south through Porter and tying up at West Durango at 8:20pm.


The Mancos Turn operates daily between Mancos and Menefee.  There is a lumber mill at Menefee that generates a significant amount of traffic.  Here the #40, and the Mancos Turn, have taken the siding for a meet with a northbound freight.


One of the great things Dale provides for operators is a Employee Timetable.  With 36 pages, it provides just about everything an operator needs to know in order to understand timetable operations; operating rules, communications (train operators and dispatcher), rules & regulations, whistle signals, job descriptions, forms, station plats and other useful information.  As can be seen by it's well used appearance, I kept my copy readily available in the back pocket.


RGS #40

I bought my version of RGS #40 before I knew that the first run had a couple of errors. The shape of the cab windows and the height of the cab are wrong.  I never noticed this until one of my fellow modelers pointed it out.  Sure enough, when I compared the #40 to my later run #41 and #42 I saw the difference.  Initially, I pulled the model off the layout but that turned out to be pretty silly.  I'm not a "rivet counter" so I decided to replace the WOW V4 sound system with my standard Tsunami2 and put the #40 back in service.

After disassembling the locomotive, I found the poor sound quality was due to the tiny speaker placed inside the boiler (red arrow).  The locomotive was also equipped with a strange plug/drawbar that I had never seen before. The gearbox was also dry which maid for noisy runner.
 

I fabricated a new drawbar and replaced the connector with a TCS color coded 6-pin mini connector.  TCS also makes this connector with all black wires but I find the color codes are matched to the decoder making the installation much easier to trouble shoot if a  problem crops up.  The speaker was moved to the tender where there is room to install a larger hi-base version.  The Tsunami2 and current keeper are also in the tender.  Here it is sitting on the Placerville house track following it's first run.  It sounds great, looks pretty good and after a good lube is a very smooth runner!
 

About This Blog

Several people have asked me about my blog and how it was created. I used "Blogger" https://www.blogger.com to create my RGS 1st District Blog.  It is simple to use and free.  All of my pictures have been taken with a cell phone, transferred to my laptop via email and then easily loaded onto the blog.  Currently I am using an I-Phone 14 for taking the pictures but my old Galaxy 6 did a fine job.  I use Photoshop to edit my pictures but any simple editing tool will do the job.  You can also add video.  Blogger includes a bunch of ready to use formats that are easy to use and modify.  I find creating the blog enjoyable and a good way to document my progress.

As always, your comments, suggestions & questions are welcome.

sdepolo@outlook.com


Saturday, May 18, 2024

Construction Update #27 - Structures for Placerville, the Ridgway Backdrop, RGS #41 & #42 & the Chama Lube House

McCarville Studios Placerville Barn at the Wye

May 13, 2024

I am really pleased with the way the Placerville barn turned out. Unfortunately, I don't think I am going to be able to use it on the layout; it's too large for the proposed location.  My decision to build the kit was based upon a couple of photographs where the barn  appeared to be smaller, especially in terms of height, than it actually was.  But, it is a pretty generic structure so I am pretty sure it will find a home somewhere else on the layout.

Builder's In Scale Shingles were used on the roof instead of the ones provided with the kit and Wild West corrugated metal roofing was used above the door.  Some additional trim was added on the ends and the loft hoist was left off.

 
All the components where initially stained with Builders In Scale "Silverwood"; I thought the stain would give the barn an old weathered look.  Unfortunately, with the milled siding, the transparent stain was a mistake.  It accentuated the size and pattern of the grain which unrealistically carried over form one board to another.  Miraculously, the Bragdon powdered pigments transformed a potential disaster into a pretty cool structure.  The powdered pigments partially filled in and covered up the unrealistic patterns in the wood.  Three colors, light gray, brown and medium rust were applied in multiple layers.  Since a sealer would tend to dissolve the pigments and re-expose the oversized grain, one wasn't used.  Unlike chalks, powdered paint pigments tend to stay in place without a sealer.   


The Placerville Cafe-Bar

September 17, 2024

The Placerville Cafe-Bar is ready to go on the layout.  The cafe-bar is a cool structure but I struggled a bit with this kit and I think the end results show it.   It looks okay but I am not satisfied with how the roof turned out even though I changed out the shingles for ones I thought would look better; they didn't. The thickness of the MDF and the angles involved left gaps between the six individual panels that make up the roof was also a problem.  I should have filled the gaps, I didn't!  In hindsight I should have also changed out the corner trim, for a thinner material, and swapped out the posts supporting the porch overhang for something a bit smaller.  These changes don't mean the materials in the kit are incorrect, they just reflect my personal preferences.

My kit did have a problem with the hole in the roof for the chimney.  It is to large or the chimney is to small.  I solved this problem by wrapping the base of the chimney with .040" styrene.  A better solution would have been to reduce the size of the hole by gluing some strip wood into the opening before applying the shingles.  Unfortunately, I didn't realize there was a problem until after I had applied the shingles.  The wrapped version is not a perfect solution but I suspect the result will improve with weathering.  I let Mike, from McCarville Studios, know about this problem so I suspect future kit builders won't face this issue.

So here is the finished product.  As previously stated "A pretty cool model of a interesting prototype". 

And here are the cafe-bar, gas station and a few trees temporarily set in place.  Before I can permanently set them in place and scenic around them, I need to figure out how I am going to fill out the hill in the background.


The Ridgway Backdrop

The Ridgway backdrop was created by Dale Krutzer and printed by Dave Wike.  It is 18" tall and 26' long.


RGS #41 and #42 Projects

I recently acquired a couple of RGS 2-8-0's at very good prices.  They are my next up on my "to do" list.

The #41 is ex Copper River & Yukon #31,  It is a later run model with the correct cab height and window.  I got it in pieces, as shown, due to a problem with the sound system.  In addition to replacing the sound with a Tsunami2 and adding a current keeper it needs to have the headlight casting replaced and and then be re-lettered for the RGS.  All Copper & River Yukon locomotives had their original headlights swapped out for the one shown on the locomotive.  If anyone wants an "authentic" Copper River & Yukon locomotive, then I would be willing to trade this model for another RGS #41 with the correct cab and windows.  I don't have the original box.

The #42 was acquired with a damaged tender; it appeared to have been dropped.  My friend Glenn Farley worked his wonders and made the repair in about 10 minutes.  I matched the Foreground model weathering with a little Scalecoat "Dark Lark Gray".  Part of the coal load was also missing when I got the model and it needs a current keeper.

The Chama Lube House

September 18, 2024

There were several posts on the Sn3 Group concerning the Chama Lube House kit from P-B-L  I built the kit a couple of years ago when I was just getting back into Sn3.  The kit easily builds into an excellent representation of the prototype.  It's a "signature" structure on the D&RGW so it really doesn't fit for the RGS.  But maybe...

The dock is removable.


As always, your comments, questions and suggestions are welcome.

sdepolo@outlook.com 


Sunday, May 12, 2024

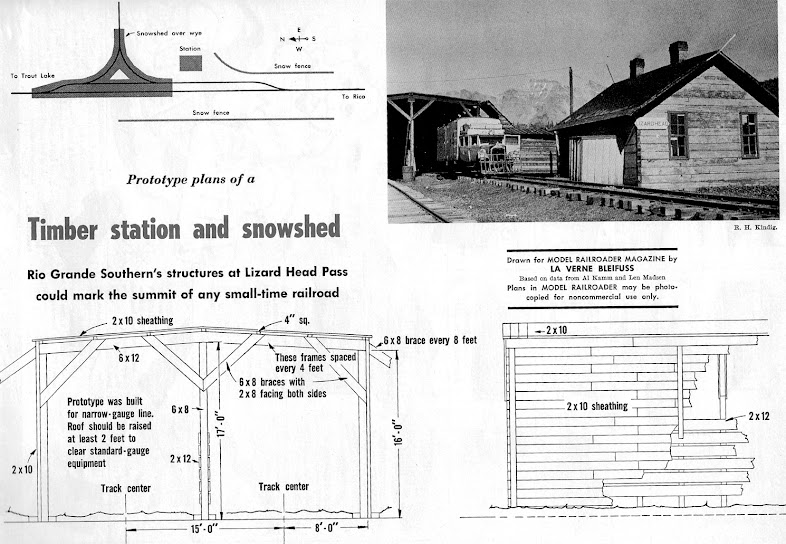
LIzard Head Snow Shed & Station Plans

 These plans were published in the December 1973 issue of Model Railroader


As always, your comments, suggestions & questions are welcome


Wednesday, May 8, 2024

Construction Update #26 - The Placerville Scale House, Cafe-Bar & Gas Station

North Placerville 

The Scale House

May 2, 2024

I really like doing scenery work and as I have previously mentioned here in the blog, I usually start with a structure or other key element and work out from there.  Here is the scale and scale house on the north end of Placerville.  The scale house is scratch built with a styrene core overlaid with scribed wood siding and Grandt Line doors and windows.  I prefer injection molded doors and windows from Grandt Line or Tichy over the laser cut wood peel and stick windows found in most of the current craftsman style kits. 

Hardware Store & Miner's Supply

These two structures are across Front Street from the scale house.  Both of these structures were built from Wild West Models kits.  The one on the left, built by Bruce Hanley, is "Harvey's Hardware".  I built the "Miners's Supply" on the right.


Here is a view looking south towards central Placerville.  The red structure in the background in the flour and grain warehouse that is behind and to the north of the depot.  The scale and scale house are in the right foreground.

Drainage Ditches & Culverts

One of the things I could have done better on previous layouts was to pay better attention to modeling how prototype railroads deal with drainage.  Poor drainage is a real problem for railroads since it leads to erosion and costly repairs.  On a model railroad adding drainage ditches and culverts not only replicates the prototype and adds interest.

The culvert shown in the photo on the right is from Grain Belt Models.  I found out about these culvert pipes from my friend and fellow modeler Kurt Boyd.  They are available in multiple scales.

The Placerville Cafe-Bar

Here is the cafe-bar sitting in it's future location.  I decided to replace the shingles provided with the kit with some "peel & stick" versions from Rail Scale Models.  I am also building the McCarville Studios Placerville gas station to go along with the cafe-bar.  It will be located to the left of the cafe-bar.  Progress has slowed when it comes to building structures. A pulled muscle in my back makes sitting at my work desk difficult.


The Placerville Gas Station

May 7, 2024

While I was waiting for the cafe-bar shingles to arrive, I decided to start on the Placerville Gas Station kit from McCarville Studios.  As mentioned in a previous post, I prefer to do as much of the assembly before the walls are installed on the base.  Here are the parts laid out on the desk.  Since I like to give every thing a coat of flat before the window glazing is installed, the glazing is one of the last things I do.

Here is a photo of the "almost" finished gas station.  I did add some additional trim work on the canopy section which is not called for in the instructions (Yes, the removable roof is on backwards in the photo).

The kit includes some corrugated metal roofing.  I decided not to use the material provided in the kit because the corrugations looked under size to me.  I checked a piece of actual corrugated metal and the corrugations were a little over 2.5" apart.  I think the material provided in the kit looks about right for HO Scale.  As a result, I decided to use the S-Scale material available from Wild West Models.  I think it is a little oversize but it is much easier to work with and I think it looks better.

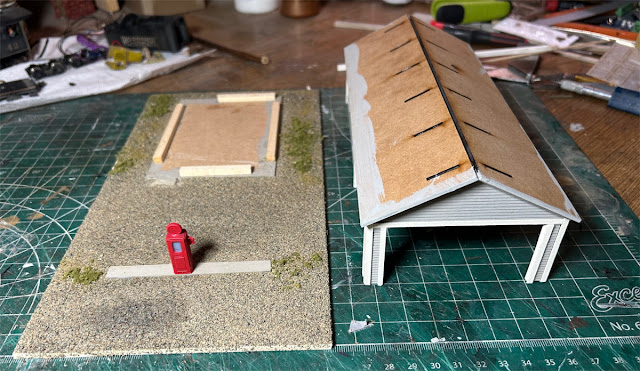
Most of the structures on the First District are mounted on a piece of styrene, hardboard or pink foam before they are installed on the layout.  I glued the floor to the base, added some strip wood to hold the building in place and glued down a bit of ground cover.  The pump island was also glued to the base.  When I have finished detailing the pump, it will be centered on the island and glued in place.

May 9, 2024

The corrugated roofing was cut to length and attached with double sided tape.  I am still using the double sided tape I purchased from Ragg's... To Riches about 10 years ago.  Similar tape is currently available from Wild West Models.  The tape has a aggressive and permanent acrylic adhesive.  The tape is expensive, about $16 a roll, but it is worth it!  The Wild West roofing comes with a "silvery" finish.  I didn't paint it; it was weathered with Bragdon powdered pigments.  

The kit came with a piece of what looks like fishing line for the pump hose; bronze wire was used instead.  The graphics came from a Micro Scale decal sheet I found in my box of "left overs".  The 55 gallon drum is a Tichy part.  I also replaced the stack with one from my parts bin.

The gas station on the left, the cafe-bar on the right, temporarily set up in their final locations on the layout.  The replacement shingles have arrived from Rail Scale Models so they will be installed on the cafe-bar this coming week.  On the prototype, the gas station was located to the west and on the opposite side of the tracks from the cafe-bar.  Due to a lack of space coupled with the desire to include these two interesting structures, they ended up here along the main line.  The spur leading to the stock pens and oil distributor is in the foreground.


As always, your comments, questions and suggestions are welcome.