
The base for Bridge 45A was built from 12 ply Baltic Birch plywood. Although it is expensive, it doesn't warp. In addition, it will be sealed polyurethane as an added precaution against warping. The ends and four of the intermediate bins have load bearing Baltic Birch supports. The other bents will just be resting on the pink foam scenery base. The bridge itself will sit between guides on each end so it can easily be removed while doing scenery. The base, while it will be screwed to the bench work, can also be removed. The level was used to insure the are no peaks and valleys in the bridge deck while measuring and installing the bent supports.

Once the base module was finished, some minor changes had to made to the existing bench work. A small section of existing L-Girder joist had to be removed and two others joists had to re-positioned. After the cuts and moves were made, everything was secured with clamps and the re-positioned joists glued in place.

Here is the bridge temporarily set in place. Pink foam was used to make additionall non load bearing bent supports. Vance Junction is on the other side of the scenic divider.

The tallest bent sat in the middle of the river on a concrete footing/base. I couldn't find a good picture of the concrete footing so I came up with a plausible design, built it out of .060" styrene and painted it gray. It still needs some weathering.

August 16, 2024
The last couple of days have been spent filling in the terrain profiles with pink foam. Here is the current state of the terrain looking south towards Ophir.

A view looking from the north to the south.

Here's another view looking south. The river (center) will drop through a series of water falls before it passes under the bridge. Since I have never attempted modeling any form of moving water, I'm probably going to need some experienced help.

And here is a photo taken from the end of the peninsula looking south. Ophir is in the distance.

Back from vacation. I have gone over how I do basic scenery in previous posts so I'm not going to go into a lot of detail here. Basically I use cardboard webbing over foam profiles covered by red rosin paper, plaster cloth and Sculptamold. The one thing I did do new was to use gap filling expanding foam to fill in between the pink foam bridge fittings. In the past I would have probably used newspaper covered by plaster cloth but I haven't purchased newspaper in years.
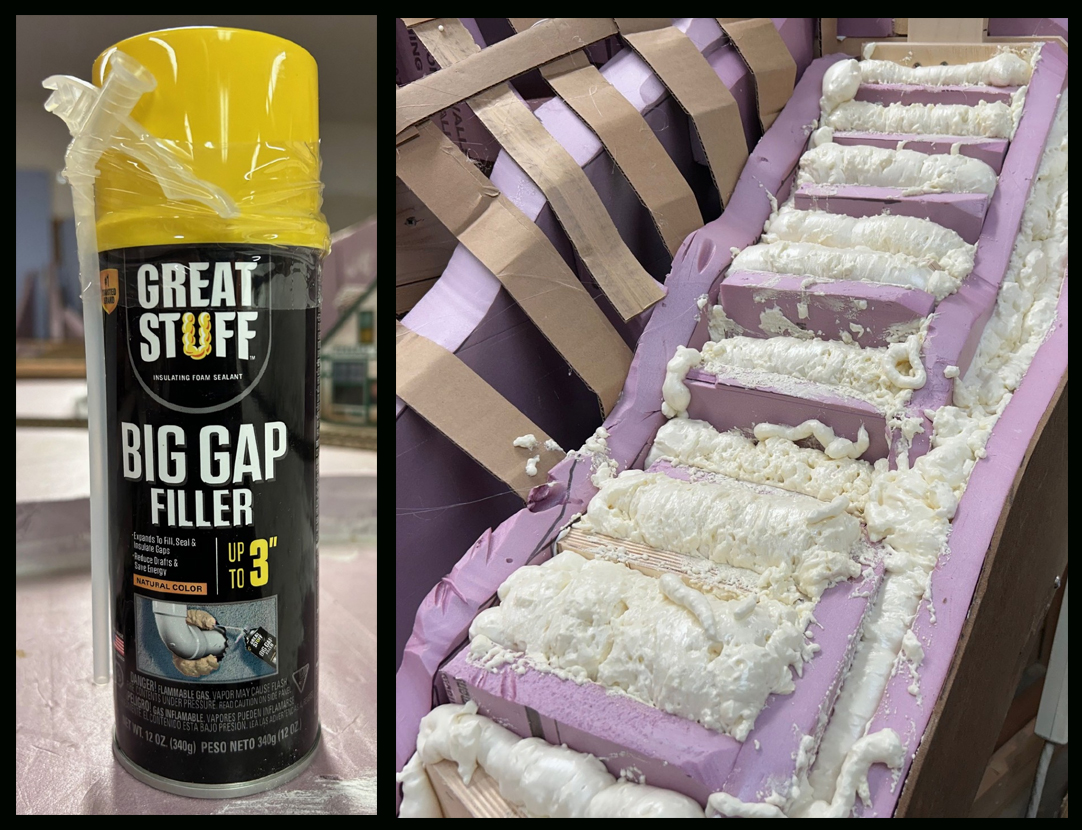
Once it has cured, about 24 hours, the expanding foam was carved back to match the surrounding terrain.

An overall view of the cardboard lattice covered with red rosin paper.

And with a layer of plaster cloth.


As always, your comments, suggestions & questions are welcome
The trestle and the scenery are just breathtaking, and I'm only talking about the model!
ReplyDeleteGreat tutorial on installing a big, com
ReplyDelete... complex bridge. Physical support; rail grade and alignment; terrain base; water features; historical reference; and material choices all have to come together. Looking good.
ReplyDelete